Title here
Summary here
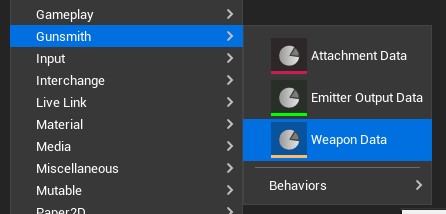
Weapons are stored as Data Assets in your project so that they can be easily loaded and unloaded when required. Creating a new weapon is simple and with the addition of the preview window to see the changes in real time, iterating on that weapon should also be a painless process. To create the data, simply right click in your content browser window and select Gunsmith->Weapon Data. Using a consistent prefix for naming is recommended and we use WD_.
Once you have named the new weapon, double click on the asset to open the editor. At the top of the details panel you should set the Unique Tag and Weapon Type for your new weapon. The Unique Tag is the weapon identifier and will be used throughout the project to access this weapon data again. The Weapon Type is what we use to tell the mesh which animation set to use. The default editor Manny is set up to use pistol, rifle and shotgun animations.
Browse to the Cosmetic category in the Details panel and you should see that there are a few options here. Mutable is highly recommended over Skeletal Mesh as you get a lot of nice features such as dynamic Skeletal Mesh composition and async mesh streaming. Feel free to read through the unofficial docs by anticto for a better idea of what it can do.
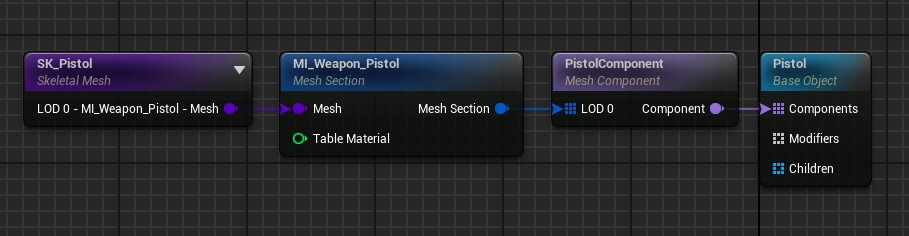
To create a simple Mutable Customizable Object, create a new asset in your Content Browser under the Mutable heading and name it CO_YourName. The image below shows the minimum setup needed to display a single mesh and if done correctly, when compiled you should see a preview in the bottom right preview screen. The name you assign to the MeshComponent is the name we will need again in the Weapon Data Asset so make sure it is memorable.
Caution
Make sure you set the “Skeletal Mesh” variable in the Skeletal Mesh node and the “Reference Skeletal Mesh” variable in the Mesh Component node to the same mesh that you’d like to use. The Mesh Component node also requires a name and the Mesh Section node requires the matching material from the mesh or you will see an error when compiling.
With the Customizable Object set up, return to the Weapon Data Asset and set the Mutable Object to reference the new asset. The Mutable Component name dropdown should show the name of the new component you created and when selected, should automatically attach it to your model.
Note
You can change which character actor is used for the weapons preview in Edit->Editor Preferences->Gunsmith->Gunsmith Editor Settings->Editor Character. If the name of your attach socket is not “weapon_r”, you can change the attach socket in the Project Settings->Gunsmith Settings under Weapon Attach Socket Name.
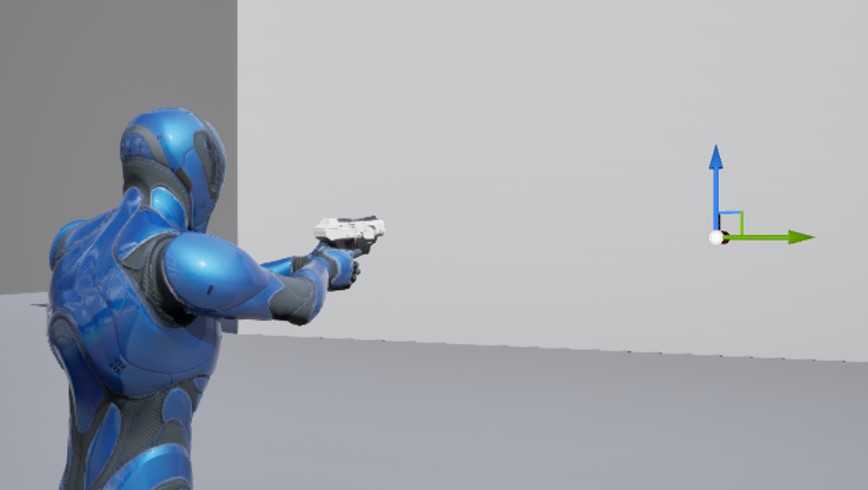
You should now see your character holding the weapon as expected but not yet shooting. Depending on your weapon asset, you may need to change the attach transform in the Weapon Data to make sure your weapon is pointing in the correct direction. You may also need to specify a muzzle socket for your projectile to shoot from. The default for this is in the Gunsmith Developer Settings but can also be overridden per weapon.
We use emitters in the Weapon Data Asset to determine what the output of the user pressing the trigger will be. A Projectile Emitter is the most common type of emitter which we will use for this guide but a couple of other examples that you could use would be a Beam Emitter or maybe even a Shotgun Emitter if you only want to affect an area in front of the character rather than using individual projectiles.
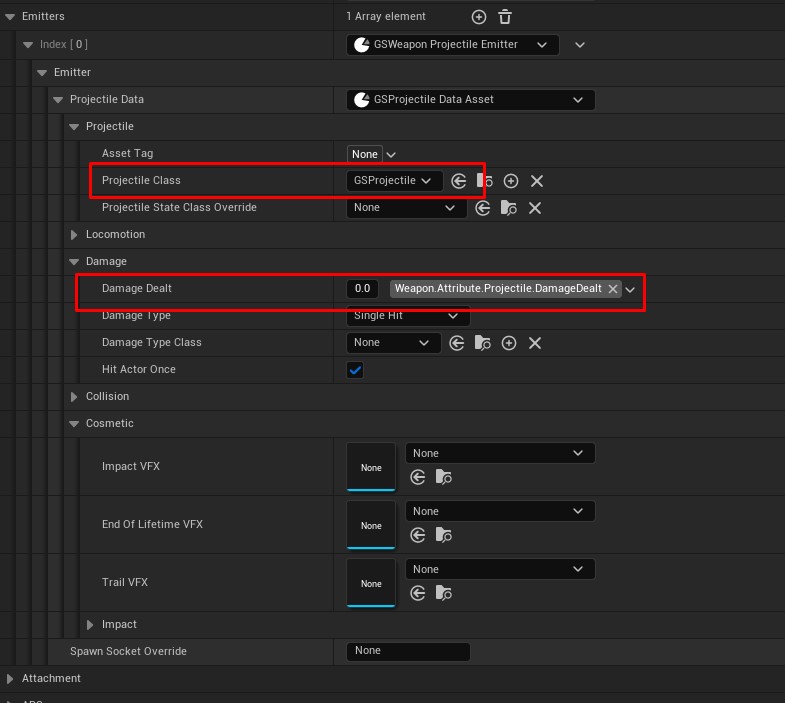
To add an emitter you just need to find the Emitter array in the data and add a new item. Set this new emitter to the GSWeaponProjectileEmitter type and then set the Projectile Data to GSProjectileDataAsset. Manny will now shoot a projectile without any attached visual data. You can set a Damage Dealt value in the projectile Damage settings if you would like to test this dealing damage in a PIE session.
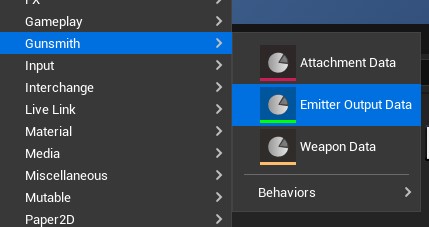
Now lets create a new Projectile Emitter Output data to store information about the projectile. This is split so that it can be shared with other weapons if needed. In the content browser right click and navigate to Gunsmith->Emitter Output Data and select the GSProjectileDataAsset. Once created, set the Projectile Data dropdown in the weapon data asset to this new blueprint.
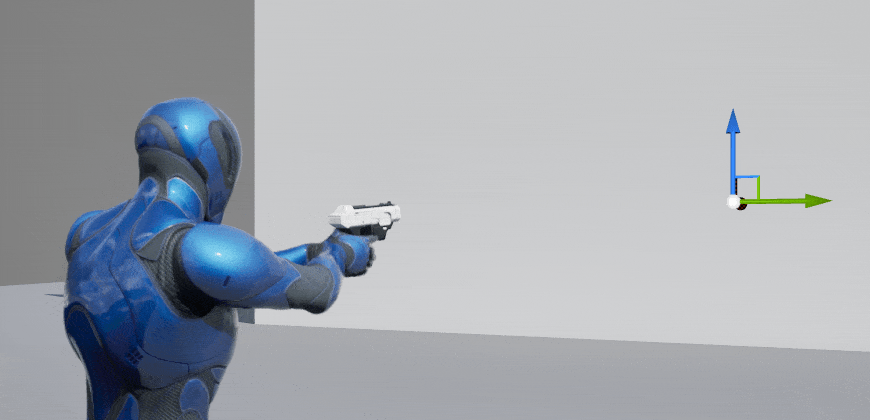
All that’s left is to create the visual actor. Right click on the content browser and create a new Blueprint class with the GSProjectile parent class. We can simply add a sphere component, set the scale in all axes to 0.1 and remove the collision. Setting the Projectile Class value in your Emitter Output data should now update the weapon preview and you can see the projectile moving!
Finally, to equip the weapon to your character you just need to set the Default Equipped Weapons variable on the shooting component. Each index in the list correlates to the slot index of the weapon but we should be ok to just stick with the 0 index for this example. Once set, feel free to test out your new weapon in a PIE session!
Note
You may still need to set your pawns animation to a holding state once your weapon has been equipped before using it. To do that, you can bind to the OnEquipped delegate in the Shooting Component.